Repairing Vineyard Nets
In this blog post, I’ll explain how to easily fix vineyard nets and extend their lifespan to keep your fruit protected. I’ve previously tried using the cable tie method, but I found that it often leaves small gaps where smaller birds can still get through. Through trial and error, I discovered a better approach that provides a more secure and long-lasting repair. Recently, I found a large tear in one of my vineyard nets big enough for birds to get through so I’ll walk you through how I fixed it.
What You’ll Need
Fluorescent builder's string or line – easy to spot for future repairs
A large needle – makes threading through the net much easier
Step 1: Securing the Tear
Start by tying a knot at the edge of the tear one or two diamonds in.
Using the large needle, weave the string in and out around the circumference of the tear, stitching roughly every 2 cm along the edge of the tear.
Avoid stitching along the very edge of the net go one or two diamonds in for a better hold.
Step 2: Reinforcing the Structure
In my case, the tear was shaped like an M (rotated 90° counterclockwise). I stitched halfway around the tear and, upon reaching the center of the M, fastened the string back to the original knot to help maintain the net’s shape.
I then continued weaving along the lower half of the M, enclosing the entire tear and pulling the netting slightly tight, trying not to let it pinch or ruffle together and tying the knot off. Providing a tightened shape to the rip but still with a gap.
Step 3: Weaving the Gap Shut
Start by knotting to your original knot from step one. Then using a diagonal weaving motion, pass the string over and under behind your previous thread, pulling the netting together as you go.
Once you reach the end, pull the string tight to fully close the gap and tie it off securely.
For large tears, repeat this process in sections, working from top to bottom.
With this method, your vineyard nets will regain their shape and strength, ensuring years of continued use.

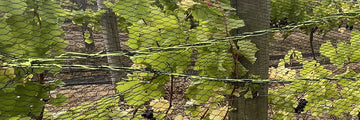
Large rip, shaped as a letter M (rotated 90° counterclockwise)

Tied at the start and outling top section of the rip.

Knotted again at the beginning, the thread now outlines the bottom section of the tear.

Pull the the thread tight, you can begin to see how the net is coming back to it's original shape.

Now weave over and under, bringing the thread of either side together.

Do this across the length of the tear, when you get to the end pull it taut and tie off. I had to repeat this action for the bottom section.

It should finish looking like this. The net maintain it's structural shape and removes any small holes.
Tips I’ve Learned from This Process
Even with simple, roundish tears, it's best to stitch around the entire circumference first. This prevents fraying, adds strength, and makes the netting more secure before weaving across.
Diagonal weaving is key—it really helps hold the net’s structure together.
I’ve previously tried a running stitch, but it didn’t hold up well the following year when reusing the nets.
This is just my experience—I'm no expert, and there may be a better alternative. But this method has definitely helped me repair vineyard nets effectively and protect my grapes from further bird damage.